Here’s the photographic evidence of what it’s like to spend Halloween with a Wealie! I’ve also provided some details of how to make the decorations too, for details on the pumpkin costume see my post How to make a pumpkin!
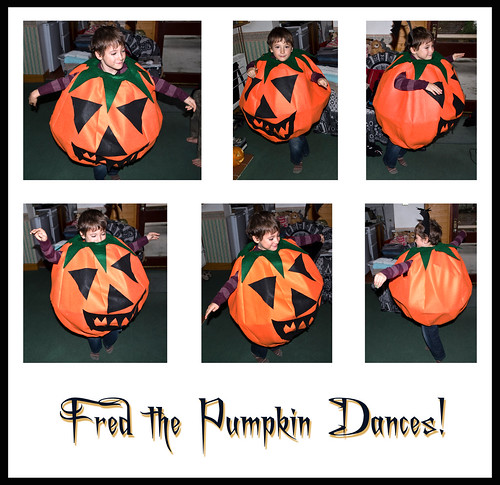
This is Dylan in the Pumpkin costume that Ben and I made for him. Ben was in charge of the frame and measurements (metal work and mathematics are not my strong suit). I handled the sewing of the fabric, adding the fine details of the face and leaves and the dubious pleasure of putting the whole thing together with my glue gun!
To make the costume took 3 square metres of orange felt, half a metre each of black and green felt, approximately 15 metres of coat hanger grade wire, a role of insulation tape, the use of a sewing machine, 9 glue gun sticks and several large chunks of my flesh when using said glue gun :-/
The result of all our hard work is Fred the pumpkin (Dylan chose his name), who is almost as wide as Dylan is tall and only just got through the doorway! This is Dylan (sorry Fred), dancing to the pumpkin rock which Ben was making up on his guitar as Dylan danced!
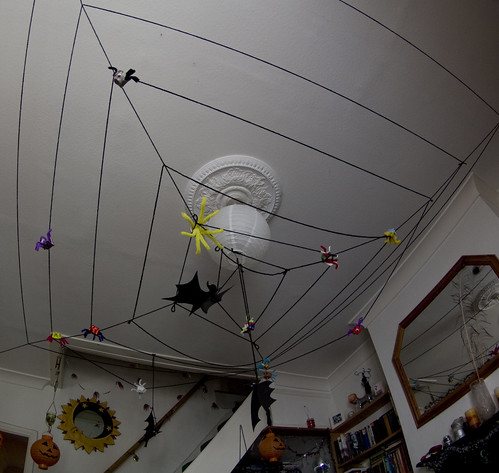
In addition to the pumpkin costume and the Wealie household pumpkins we also created a giant cobweb on the living room ceiling and added some home made spiders. To make the web you need a few drawing pins and a big ball of thick black wool. Pin the drawing pins into four equal corners of your ceiling and take a length of wool from each pin to the centre of the room and either pin them to the centre, or tie them around the light fitting (being careful of any fire hazards!).
Working from the centre out, tie a knot about 10 cms from the middle on the first of the four lengths, unwrap enough wool to make a line to the next length and again tie a knot. Work round all the four lengths until you have a square. Move out another 10 cm on the first length and repeat the process. Once you’ve gone as far as possible cut your wool, lie on the floor and look up! You’ve now got your very own home made cobweb.
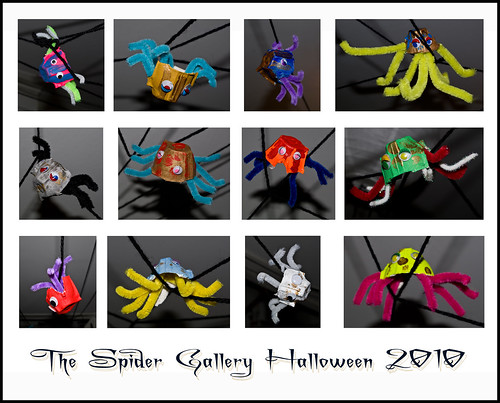
The spiders are easy to make, just cut up an egg box into the individual sections and paint each section, these become your spider’s body, so for a half dozen box you will be able to make 6 spiders. You may need to trim down the edges on some of the more modern egg boxes.
To make the legs take two standard length pipe cleaners and cut them in half, these four lengths will form your spider’s legs. Put a glue dot in the centre of each length of pipe cleaner and glue to the inside bottom of the spider body.
Then you just fan out the legs and twist to make feet to cling to the cob web. Finally use some more glue dots to attach a couple of googlie eyes and your spider is ready to sit on his (or her web) as in the picture above.
Anything goes with the Wealie household spiders and Dylan was in charge of choosing the colour matches and patterns for the bodies and legs. The gallery below shows the twelve spiders created this year. The red and purple one in the bottom corner is mine and Dylan’s favourite!
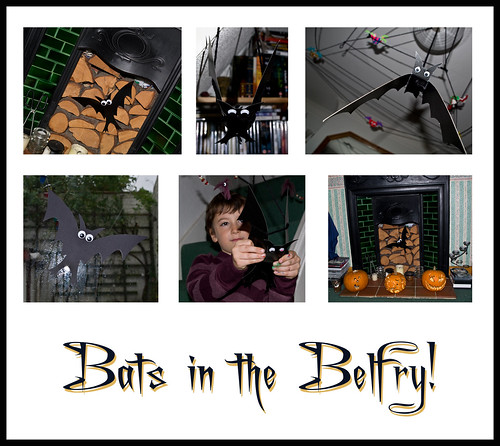
The last in our menagerie of Halloween creepies are the bats, which are showcased in the belfry gallery below. Ben takes all the credit for the bats, he based the design on the pattern from some Halloween fabric that we bought. Ben created a template on white paper, which he then cut around on the black card. There was some interesting times had trying to suspend them properly, but they looked quite effective. Personally I quite liked them stuck flat against the fire place and back door too!
So now you’ve got some idea of what Halloween is like in the Wealie household. I hope you had fun making your Halloween decorations and costumes too.
Happy Halloween one and all!
Wealie x


 Follow Wealie on Feedburner
 Follow Wealie on Google
 RSS feed of Wealie's Blog
 GeneralWealie on Twitter
 Ruth Weal Daily on Paper.li
 Ruth Weal on Facebook
 Wealie on Flickr
 Wealie on Google+
 Wealie on Instagram
 Wealie on LastFM
 Wealie on MySpace
 Wealie's YouTube Channel
 GeneralWealie on Google
 info@wealie.co.uk
 Ruth Weal on LinkedIn
 Ruth Weal on skillpages
 Wealie on Brainshark
 Wealie on SlideShare
 Wealie on Etsy
 Wealie on Instacanvas
 Wealie on redbubble
 Wealie on Society6